Wednesday, November 19, 2014

Blender 3D Basics Beginner's Guide by Gordon Fisher


Peering over the cover of this book I see a Blender and primitive shapes on the cutting board: a cone, a torus, a sphere and a tube about to be sliced by a knife.  Sounds like a culinary danger, but this is a reference to the Blender 3D software.  Gordon Fisher wrote Blender 3D Basics Beginner's Guide to uncover the mysteries of the blender interface which all new artists to this software face.  His instructions are so thorough that they answered some of my lingering questions even though I had been acquainted with Blender through my modeling efforts.  This book covers modeling a rowboat, oars,  a sailboat, an island, a tree, animating the oars, using key frames, cameras, the graph editor, dope sheet and the  video editing sequencer.

Here are some the book's highlights:

Chapter One the author discusses the history of animation and computer graphics and gives the reader a few assignments: watch animations and collect your favorite animations.
Chapter Two:  covers the Blender interface, the author guides the reader through a series of exercises: re-sizing the view port, the visual differences in orthographic vs. perspective, and navigating the view port.

Chapter Three describes the lamp, how it looks in the view port, how to move it and guides the reader through a series of lighting exercises.
Chapter Five guides the reader to build a row boat using box modeling techniques and extruding vertices.

Chapter Ten Gordon explains how to use the Ant Landscape add-on to procedurally generate a crescent shaped island.  He guides the reader to use the Sapling add-on to generate a realistic looking tree.  He uses the array modifier to make a pier.  He models the portals of a sailboat using a Boolean modifier.

Chapter Eleven I see advanced lighting techniques that I haven't encountered in other Blender books, cookies!  Cookies apply textures to lighting.  The first time I encountered cookies was with Unity software.  The author uses cookies to provide mood lighting.  He also explains how to use curves in lighting to focus on a specific area.

Other topics covered in this book include planning your animation, examples of using a storyboards,  camera techniques Dolly vs zoom, compositing using nodes, dope sheet, graph editor, adding audio, how aspect ratio affects what gets cropped out of a picture and cycles rendering.  This book is for a beginner, but it guides them to excellence.

To find out more about this book here's the link :
https://www.packtpub.com/hardware-and-creative/blender-3d-basics-second-edition


Tuesday, November 18, 2014

Making Fortress Island

It began with a simple doodle almost resembling a sunny side up egg.  Why model an island? Unity offered a challenge: make an island using your favorite 3d software and post it sketchfab. I downloaded the latest version of Blender 2.72.  I was excited to open the new version of Blender and I saw a new tabs vertically arranged on the left.  I clicked on the create tab and saw cone, cube, tube, sphere and torus meshes.  I added a circle to my scene and extruded up forming a pumpkin shaped fortress.  I extruded the top ledge then extruded down.  I selected the bottom vertices and extruded outward the rest of the island.
I modeled my palm trees, made a UV map of the island and applied textures of sand and water.  I made a normal map of my textures using GIMP software. In Blender I enabled the sketchfab export add-on by checking the box in user preferences and saving my preferences. The upload tab appeared on the bottom left.  I uploaded my model to sketchfab as a .blend file and then added my UV map and adjusted the material settings.  I added a treat for my island a Milkyway background from sketchfab and a vignette effect.  I enjoyed peering into my small magical landscape and zooming in on the palm trees.


Monday, November 10, 2014

My first model in Sketchfab

Hello folks.  I am delighted to share with you my first  3D model on Sketchfab.  With Sketchfab's embedded player you will be able to zoom in on my spaceship  using your scroll button, turn the model around  by holding down the left mouse button and dragging the view left or right. 
I invite you to take it for a spin. 


Saturday, August 2, 2014

Book Review: 3D Printing with Rep Rap Cookbook

3D Printing with RepRap Cookbook was written by Richard Salinas for the reader who has a Rep Rap 3D printer and is ready to learn how to print better models.  The author guides the reader through numerous printing exercises involving calibration, flow rate and test models.  Numerous color photos show print results using ABS and PLA filaments.

Chapter one shows the reader how to take photos of an actual object and stitch them up with 123D Catch to make a 3D model.  I enjoyed reading chapter three which shows how to install a David Laserscanner using a webcam and a common laser to scan small objects.  I also found clear images of host interfaces like Repetier which you install on your computer to control your printer. The author also compares slicing programs Slic3r and Skeinforge interface as well photos of the printed results.

Richard describes 3D modeling with TopMod to create organic forms with carefully designed support meant to be strong and easier to remove from the printed model which is knowledge that can only be gained by experience.  He shows how to fix mesh problems with MeshLab for manifold issues, inverted mesh, as well as reducing the amount of polygons of dense models.  He adds textures to his lovely starfish model with meshmixer.  The author shows the lattice technique to prevent printed filament from curling up and distorting the model.  He also discusses trouble shooting the actual 3D printer and common issues like a loose heatsink.

You can find more information of this book by clicking on 3D Printing with Rep Rap Cookbook
as well as this link  http://bit.ly/1jAyZ2U
You can find more information about Richard by visiting his website http://www.3dprintedsculpture.com/

My first game asset


I recently made my first game asset. I crafted a low poly model which I named Ralphy using Blender 3D.
I used a texture from a digital artwork I made a while ago using GIMP to modify a photo of a geranium to look like gold leaf.  I added my texture to the UV map.  I planned for a simple animation using only three keys and twenty frames.  I then exported my .blend file as a Collada file with a .dae extension to a Unity folder named models and inserted Ralphy to a tropical scene.
Next I plan to further my modeling skills by sculpting a spaceship in Blender 3D.


Friday, January 24, 2014

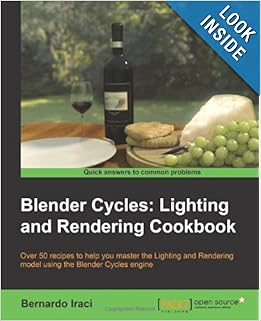
Book Review: Blender Cycles: Lighting and Rendering Cookbook by Bernardo Iraci


Reading this book I came to realize how Blender can produce images with photorealism accuracy.  Bernardo Iraci's recipes are float point precision from RGB colors, Index of Refraction to factoring levels in mixing nodes.  Photographic terms: depth of field, bokeh effect and exposure levels are used.  The author begins by discussing GPU vs. CPU and video cards.  He introduces the reader to the three point light system using emitting planes and gives those lighted mesh subtle hues.  I like the way he lights the environment.  An hdr image is loaded in the environment texture which adds reflection. He uses sun position along with an IBL plug in and chooses Latitude, Longitude and Time settings for the outdoor landscape.  Grass is made with the particle system which is ready for animation.  He guides the reader for changing the scenes.  The interior scene with plant, lamp, chair bathed in sunlight becomes night.  IES, a plug in used by professionals, saves on polygon count.  Throughout the book the author maintains focus on the lighting,  IOR, rendering time, nodes while he develops textures for a glass full of water,  a glass of wine, bottle of wine, grapes,  a car with realistic reflections, toys inside a space ship, and a model of a young lady by the sea.

Thursday, January 23, 2014

From Pinterest to Upcycling

Whenever I pour over my Pinterest boards I think about the projects I've seen and what I would I want to make. Upcycling or if you prefer recycling is an art form.   I would like to make a stain glass embedded wall as seen on my Pinterest boards of earthag homes, cob, earthship using empty bottles.  I am not a vegetarian, but I would like to make millet milk and cookies, because in same process you get both.  Strain the grain/nut milk and bake the paste with a little bit of sugar.  The 30 day drawing challenge could be used to make character and environment art which could become game assets.
What have I tried? Well, I took my broken rake into the kitchen and mounted on the wall so that it now holds salad tongs, tea strainer, wooden spoon, measuring cups.  I also turned an empty Chantilly box into a shelf.  The shelf carries my favorite collection of nail polish.  I cut the plastic cover and hot glued it.  I cut washers from the plastic and hung it on the wall with small brass screws.  Voila!